cat content/blog/firebase-contentful-markdown-blog.md
Firebase と Contentful で自分だけの Markdown で書ける Blog を作る
- Firebase
- Contentful
- Markdown
Firebase と Contentful を使い、Markdown で書ける自分用ブログを作った手順の記録。
Blog いいですよね。
しかもそれが、自分だけのオリジナルだったら、さらにワクワクしませんか?自分はします。というわけで、Firebase と Contentful でさっそく作ってみましょう。大丈夫。簡単ですし、基本的に無料です。ちなみに、このブログも Contentful で書いています。
今回作るもの
完成品がこれです。自分だけのURLで、自分の好きなようにブログが作れます。
実行するのに必要な知識
- Firebase CLI を含めた Firebase への理解
- HTML マークアップの基礎知識
1. 登場ワードの説明
Firebase
Firebase とは、Google が提供するアプリや Web の開発に使用できるプラットフォーム。
いわゆる BaaS 。
BaaS
BaaS とは、ざっくり書くと、アプリや Web に必要な機能を細かく提供しているサービス。
AWSなども有名。
CMS
CMS とは、コンテンツ管理システムの事。ウェブコンテンツを構成するテキストや画像などのデジタルコンテンツを統合・体系的に管理し、配信など必要な処理を行うシステムの総称。 by wikipedia
Contentful
Contentful とは CMS のひとつ。従来の CMS とは違い、ビューがないのが特徴。従来の CMS と比べると技術的難易度は少しだけ高いが、ビューを好きに開発できるのはメリットとも言える。対をなすサービスに Strapi などもあるが Strapi は CMS の管理画面も自分で立ち上げる必要がある為、難易度はもう少しだけあがる。
Markdown
Markdown とは、文書を記述するための軽量マークアップ言語。
慣れるとすごく書きやすいです。(感想)
2. Contentful でブログを作る
とりあえず、ブログのデータがなければ始まりません。ここから Contentful にサインアップしましょう。
サインアップをポチポチすすめていけば、これに似たような画面になると思います。
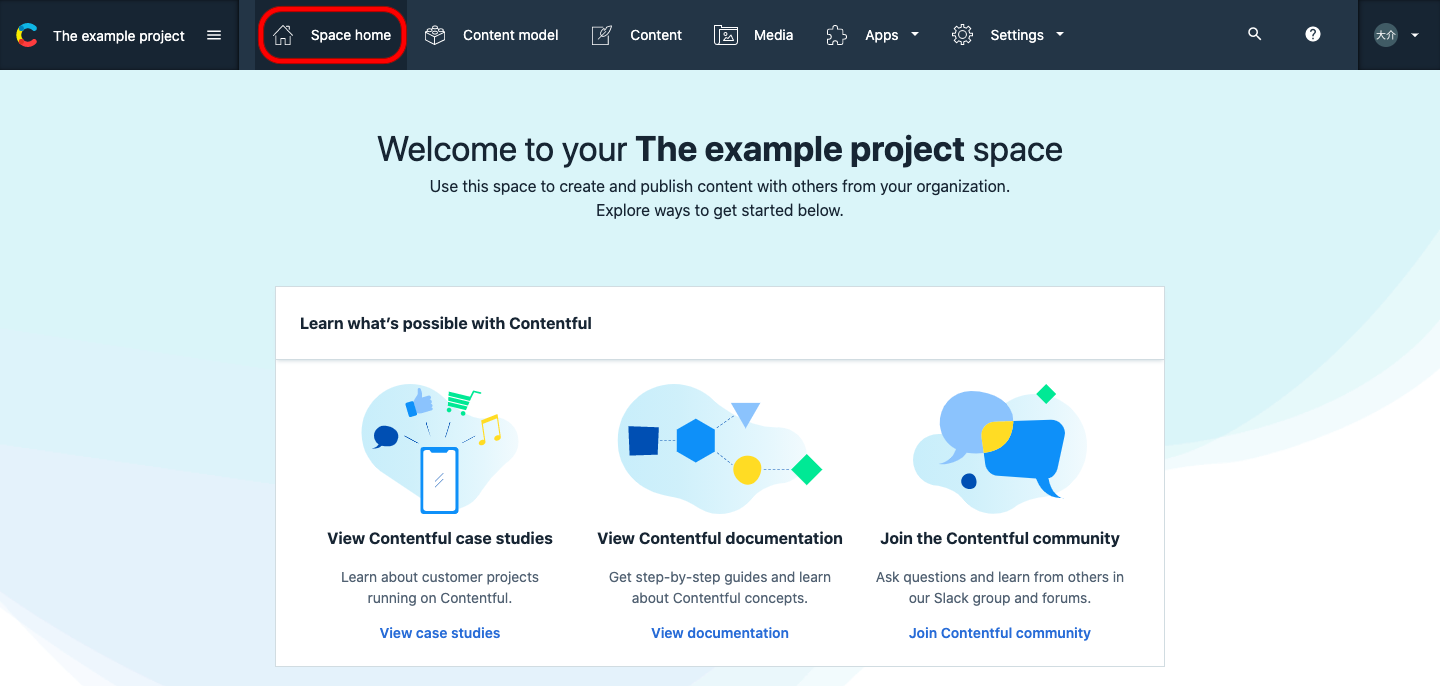
サンプルプロジェクトが展開されましたね。でも、サンプルはちょっと邪魔なので画面上部のグローバルメニューの「Space home」をクリックしましょう。
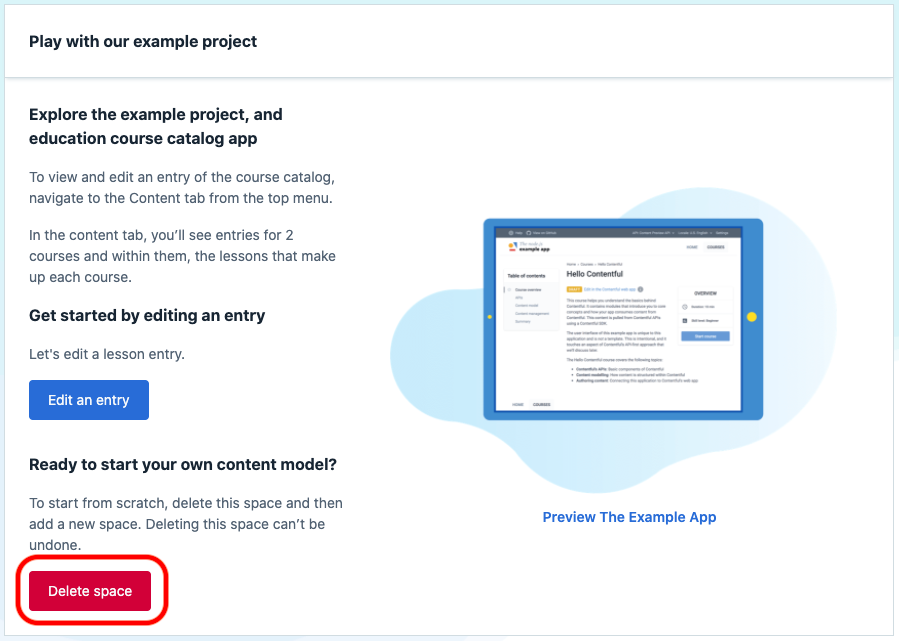
まっさらで作る!ということで「Delete space」をポチします。
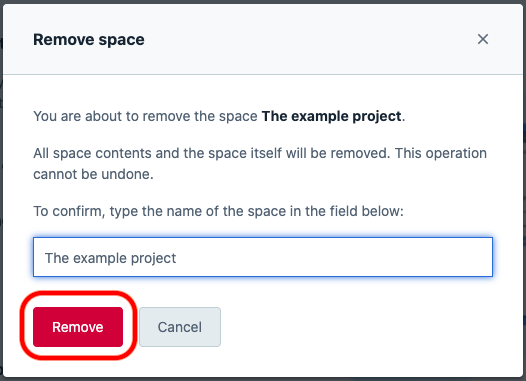
project 名をタイピングして「Remove」しちゃいましょう。
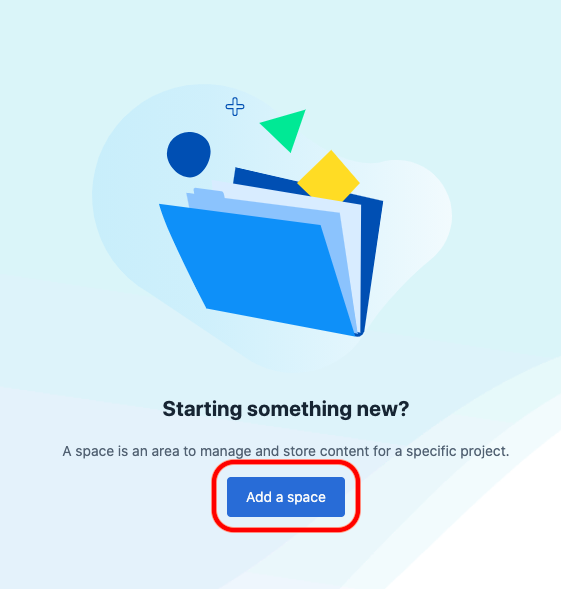
「Add a space」が出てきますので、ポチっとします。
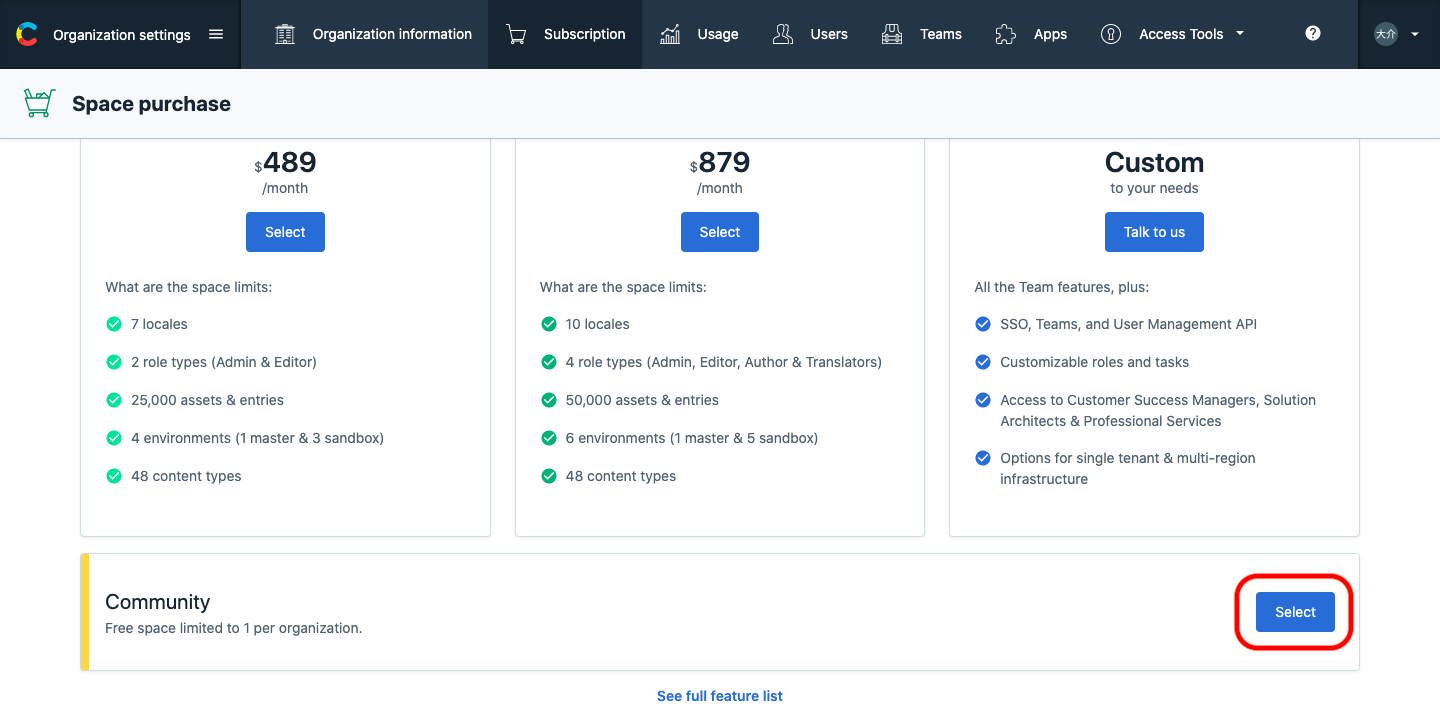
プランの選択が出てきますので無料の「Community」版を選択しましょう。
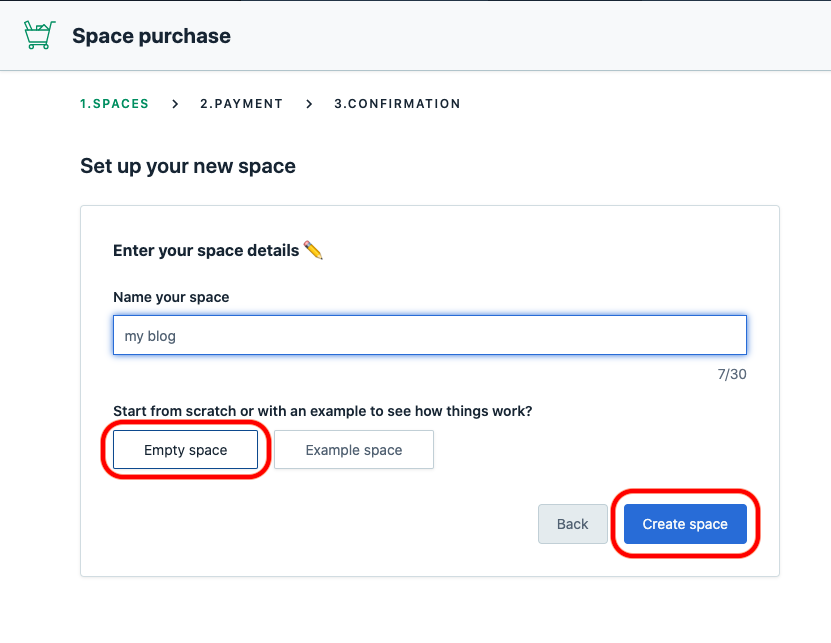
Blogに付きな名前をつけて「Create space」をポチ。
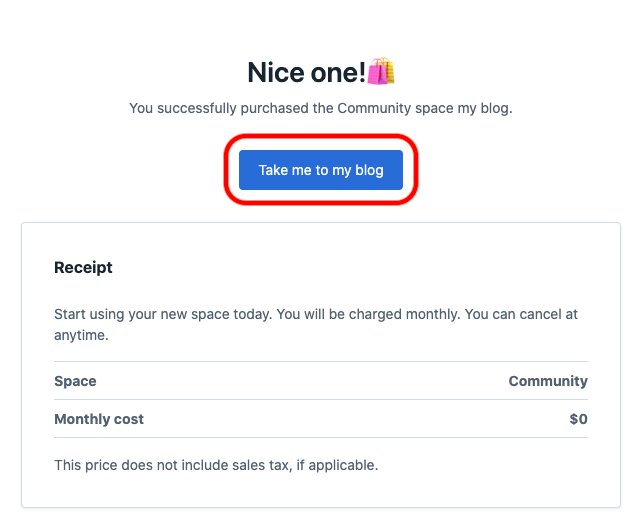
これでまっさらなあなたのブログが出来ました!「Take me to xxx」をポチッとしましょう!
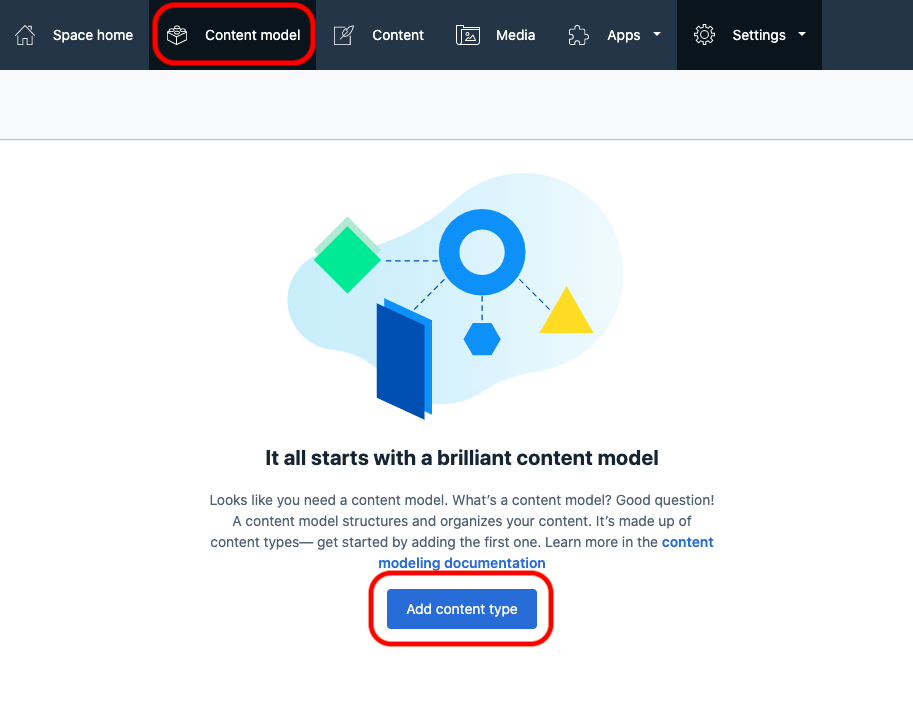
そしたらさっそくブログの骨組みを作って行きましょう。画面上部の「Content model」をクリックして「Add content type」をクリックします。 「Content model」とは、ブログのタイトルとか本文とか作成日とかキーワードとかタグとか色々な構成要素を定義できる場所です。
今回はタイトルと本文だけのブログをまずは作ってみましょう。
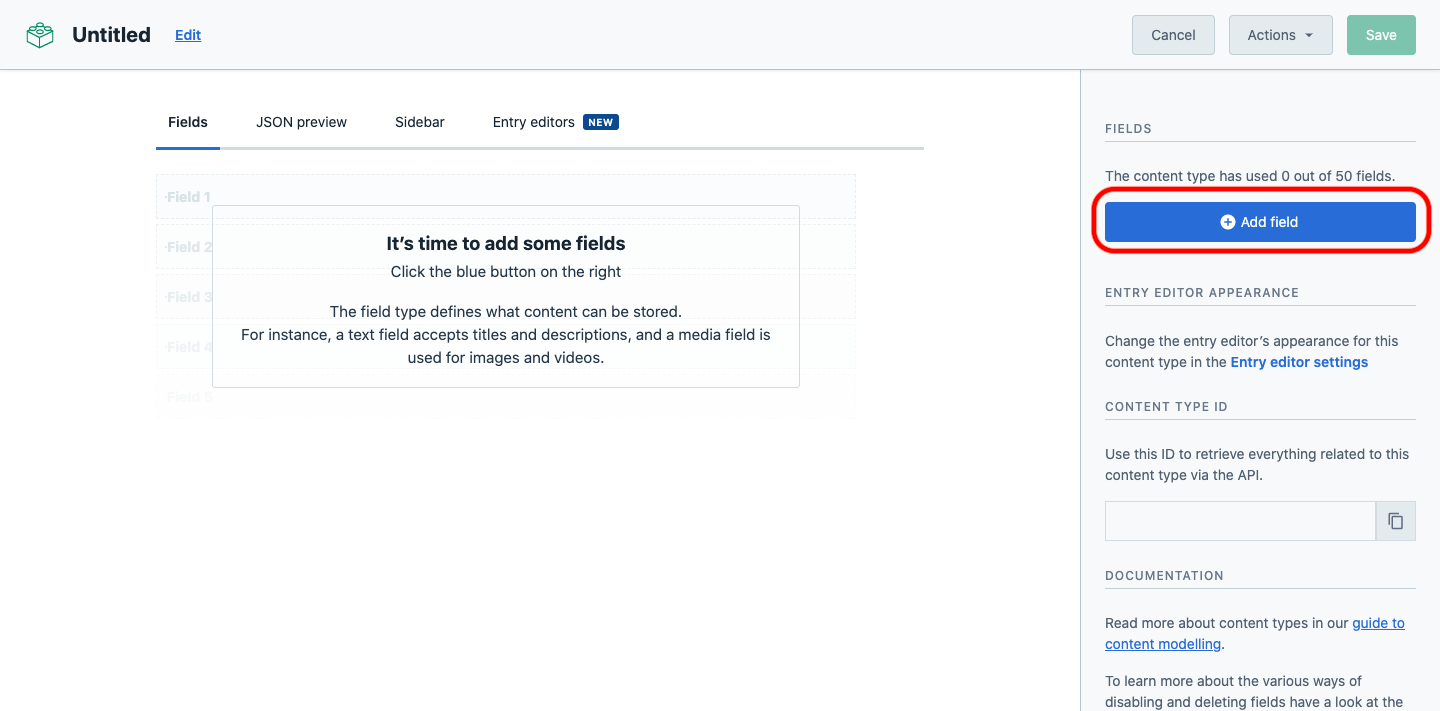
「Add field」をクリックします。fieldというのは構成要素の単位みたいなものです。
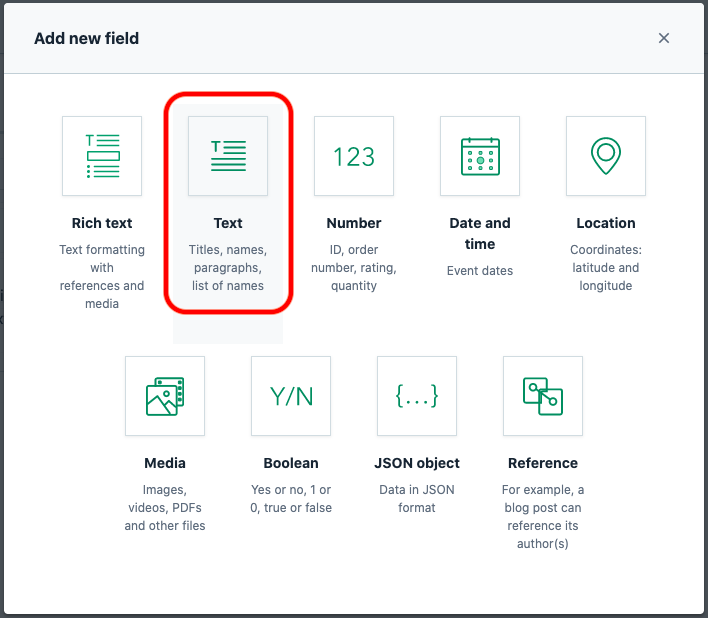
色々とタイプがありますが、まずは「Text」を選びましょう。
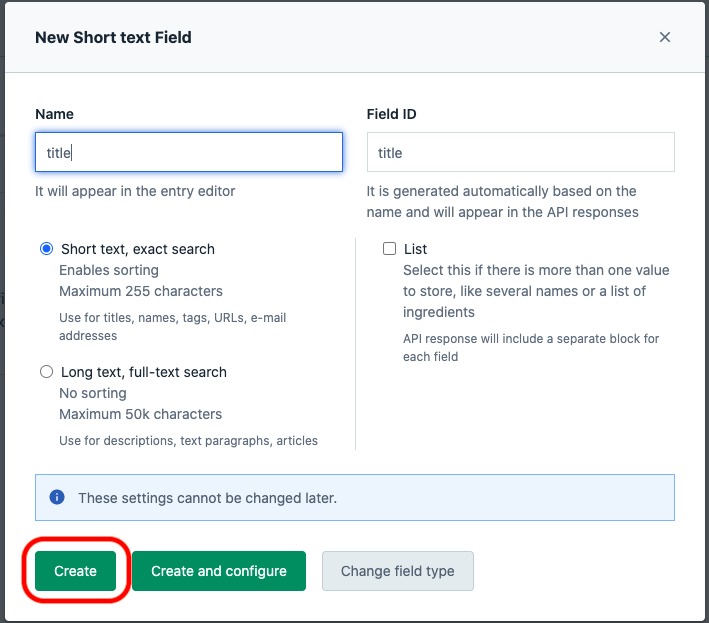
Name に「title」と入れて「Create」をポチッとします。これで記事のタイトルを入れる field が出来ました。
次に本文を書く field を作りましょう。同様に「Text」をポチッとするところまで進めます。
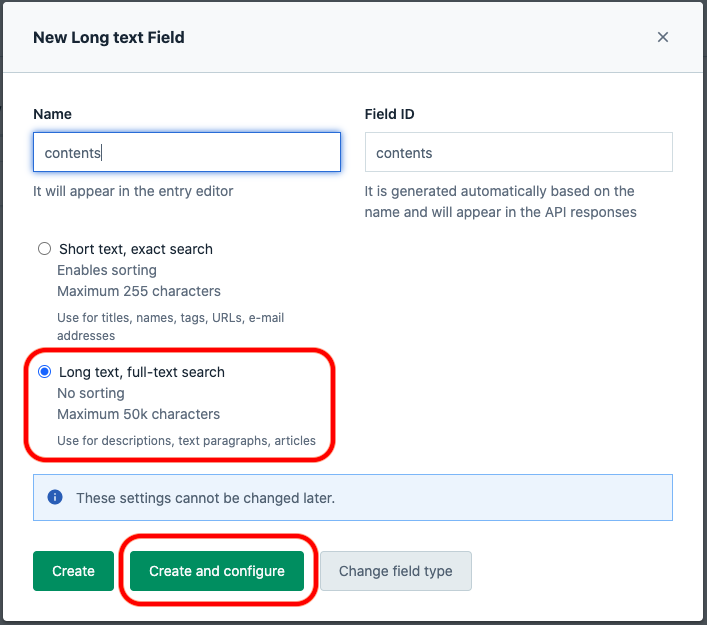
Name に「contents」と入れて、ラジオボタンで「Long text」を選び「Create and configure」をポチッとしましょう。
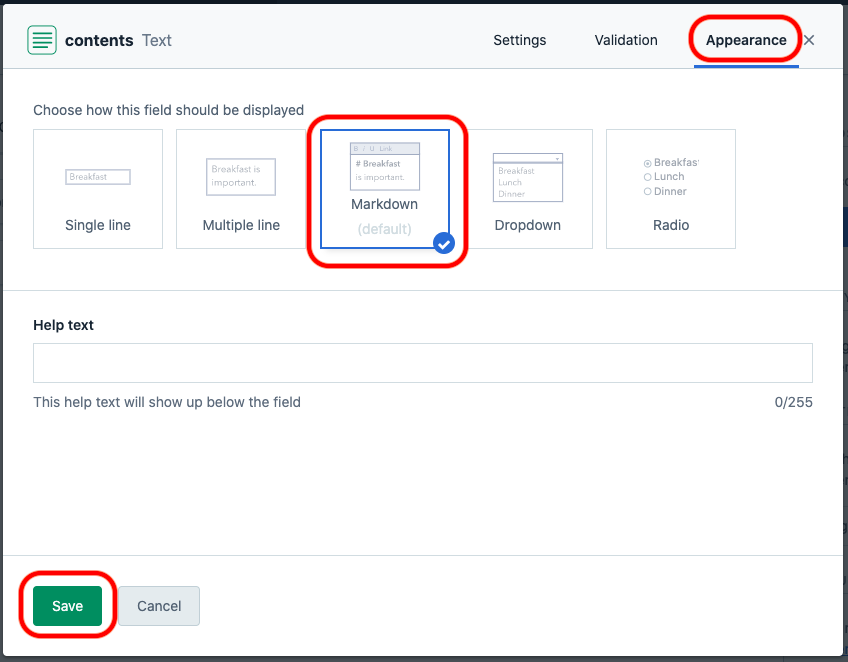
「Appearance」のタブをクリックして「Markdown」が選択されている事を確認したら「Save」をポチッとしましょう。
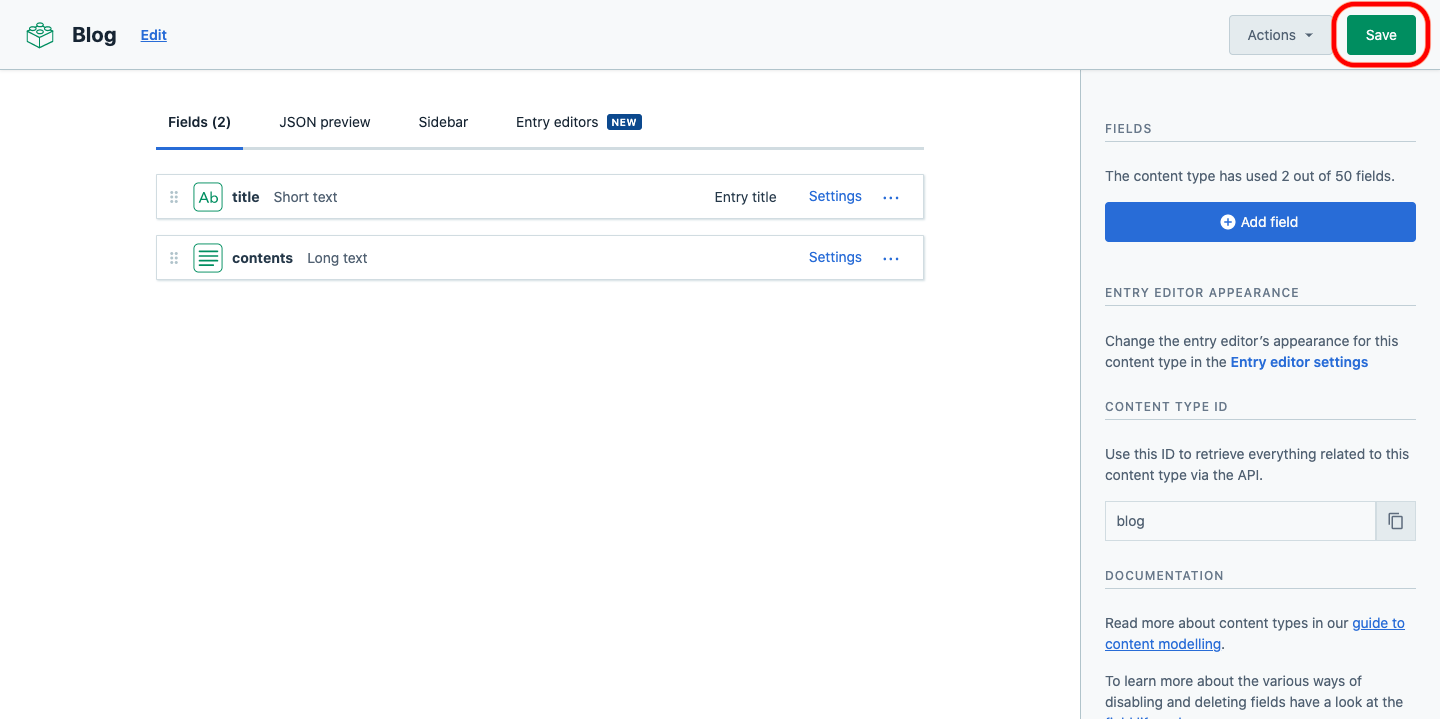
2つの field が出来たら「Save」をクリックしましょう。 これで、タイトルと本文をもつブログが書けるようになりました。
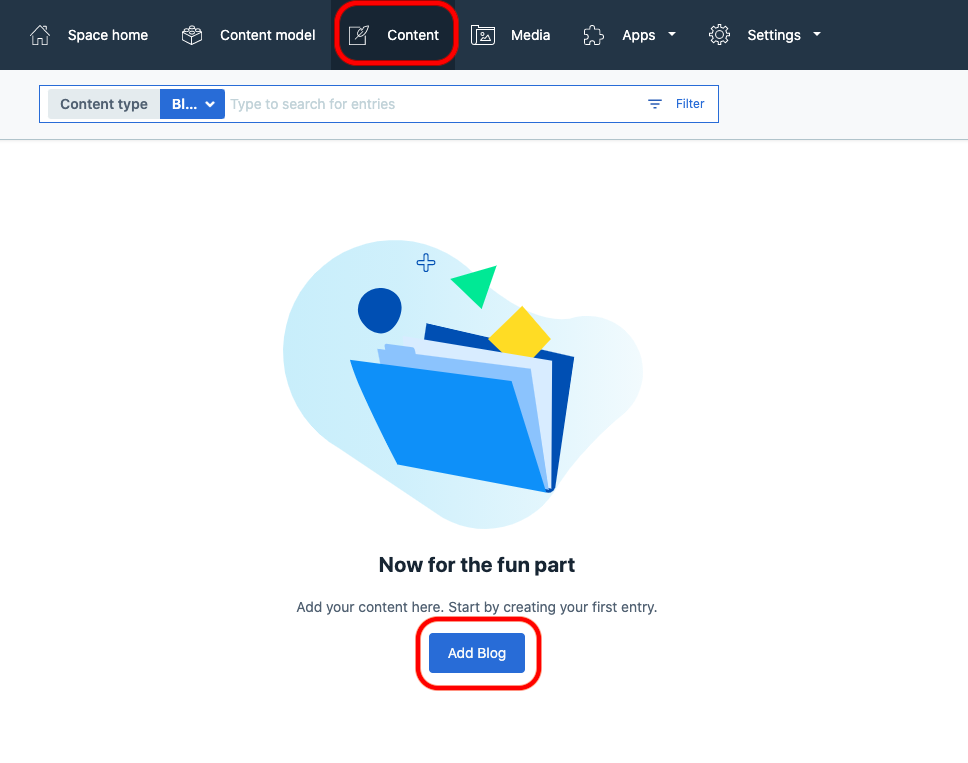
そしたらグローバルメニューから「Content」をクリックして「Add Blog」を ポチッとしましょう。

先程定義した field が出てきましたので、お好きな中身を書いて「Publish」をポチッとしましょう。本文には定義した通り Markdown が使えますので Markdown を使って書いてみましょう!
Publish が終わればブログの公開が完了です!
が、ヘッドレス CMS ですので、このままでは誰にも読んでもらえません。読んでもらえるように Web サイトを作って行きましょう。そのためには API Key を取得する必要があります。Contentful で書いたブログは API にて取得できるのです。
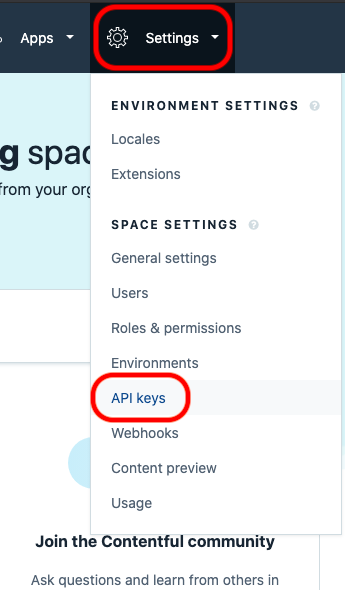
グローバルメニューの「Setting」から「API Keys」をクリックします。
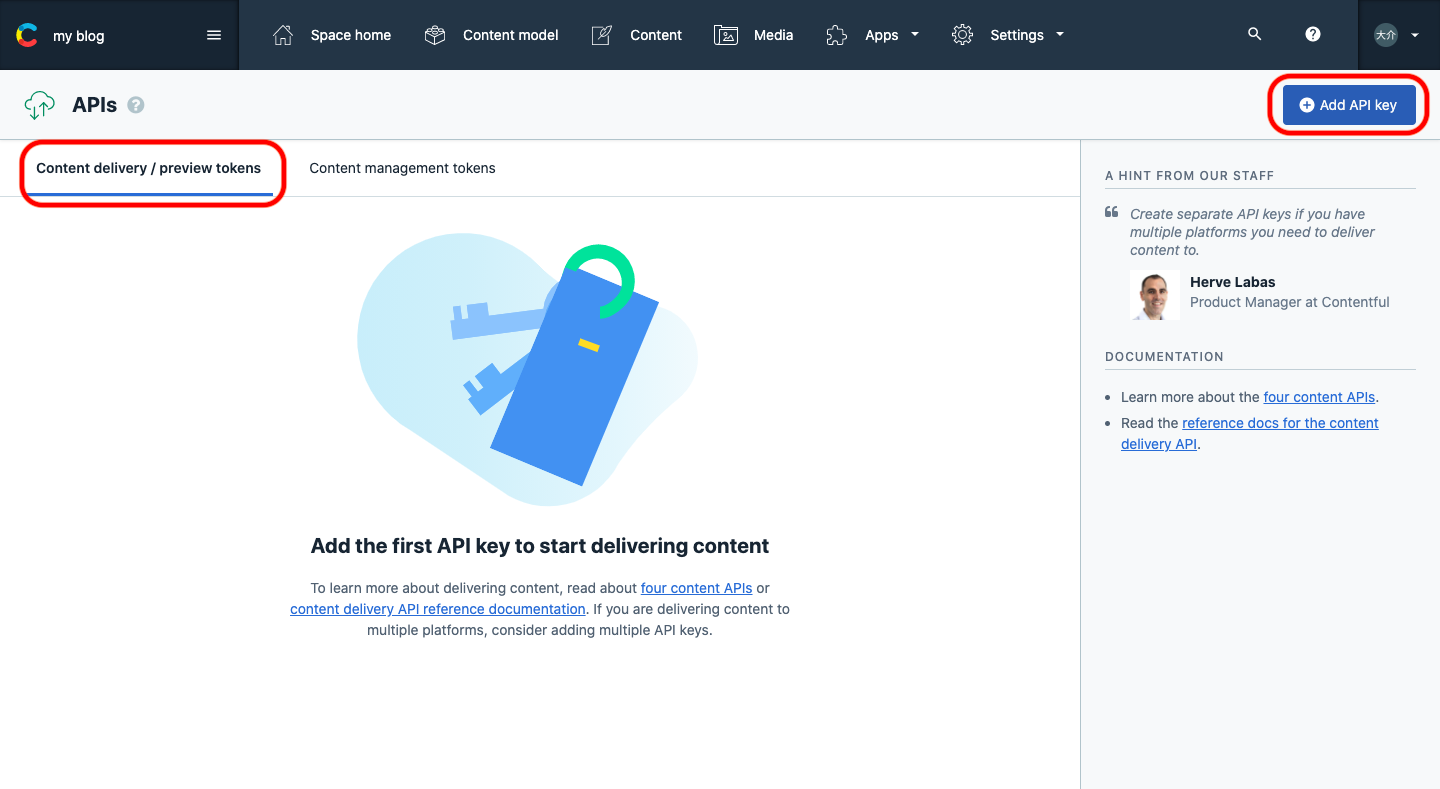
「Add API Key」をクリックしましょう。

Name に好きな名前をつけて、IDとアクセストークンをコピーしてメモ帳かなにかに保存しておきましょう。これで一旦 Contentful での作業は終わりです。次は Firebase で自分のサイトを作ります。
3. Firebase で自分のサイトを作る
先程作ったブログを公開するためのwebサイトを作りましょう。Firebase にアクセスして、プロジェクトを作りましょう。プロジェクトを作ったらお手元のターミナルから firebase init を実行します。Cloud Functions と Firebase Hosting を使用します。
なお、プロジェクトは従量制のプランにしておきます。Cloud Functions が従量制でないと使えないからです。基本的には従量制の中の無料枠で収まると思いますがご注意ください。
Cloud Functions
JavaScript で書かれた関数を実行するためのサービス
Firebase Hosting
静的コンテンツや動的コンテンツのホスティングサービス
$ mkdir myblog$ cd myblog$ firebase init
? Which Firebase CLI features do you want to set up for this folder? Press Space to select features, then Enter to confirm your choices. ◯ Database: Configure Firebase Realtime Database and deploy rules ◯ Firestore: Deploy rules and create indexes for Firestore ◉ Functions: Configure and deploy Cloud Functions ◉ Hosting: Configure and deploy Firebase Hosting sites// Functions と Hosting を選択 : :? Please select an option: (Use arrow keys)❯ Use an existing project// 先程作ったプロジェクトを選択 : :? What language would you like to use to write Cloud Functions? (Use arrow keys)❯ JavaScript : :? Do you want to use ESLint to catch probable bugs and enforce style?N : :? Do you want to install dependencies with npm now? (Y/n) Y : :? What do you want to use as your public directory? (public) public : :? Configure as a single-page app (rewrite all urls to /index.html)? (y/N) N : :? Set up automatic builds and deploys with GitHub? (y/N) N
✔ Wrote public/404.html✔ Wrote public/index.html
i Writing configuration info to firebase.json...i Writing project information to .firebaserc...i Writing gitignore file to .gitignore...
✔ Firebase initialization complete!これで myblog ディレクトリに functions ディレクトリと public ディレクトリが出来ました。今回は基本的に Hosting へのアクセスを Functions で rewrites してサイトを作ります。
firebase.json を下記のように修正してみましょう。
firebase.json
{ "hosting": { "public": "public", "ignore": [ "firebase.json", "**/.*", "**/node_modules/**" ], "rewrites": [ { "source": "**", "function": "app" } ] }}hosting の設定に rewrites をこのように追加することで hosting へのすべてのアクセスが functions にリライトされます。
次に functions に必要なモジュールを追加します。
$ cd functions$ npm i express contentful markdown-itインストールしたモジュール
Express.js で Cloud Functions の配信をコントロールして contentful.js で先程作ったブログのデータを取得して markdown-it で markdown で書いたブログを HTML に変換します。
次に functions/index.js を次のように修正してみましょう。 基本的な説明はコメントアウトにて書いております。contentful の ID やアクセストークンは適宜自分のと差し替えてください。
functions/index.js
const functions = require('firebase-functions')const express = require('express')const contentful = require('contentful')const MarkdownIt = require('markdown-it')const md = new MarkdownIt()const app = express()
// contentful に ID とアクセストークンを渡してデータを取得できるようにするconst client = contentful.createClient({  space: '先程メモ帳に貼ったID',  accessToken: '先程メモ帳に貼ったアクセストークン',})
// '/' にアクセスしてきたらapp.get('/', async (req, res) => {  // ブログの記事一覧を取得する  const blogList = await client.getEntries({    order: '-sys.createdAt',    content_type: 'blog',  })
  // ブログの記事への aタグ を作る  const blogLinkDom = blogList.items.reduce((acc, cur) => {    return acc + `<li class="blogList"><a href="/blog/${cur.sys.id}">${cur.fields.title}</a></li>`  }, '')
  // 作成した aタグ を埋め込んだ HTML を返す  res.send(`<!doctype html><html>  <head>    <title>My Blog</title>    <meta name="description" content="My Blogです。">    <meta charset="utf-8" />    <meta name="viewport" content="width=device-width" />  </head>  <body>    <div class="wrap">      <h1>My Blog</h1>      <ul>        ${blogLinkDom}      </ul>    </div>  </body></html>`  )})
exports.app = functions.https.onRequest(app)
次に public フォルダを空にしましょう。rewrites の設定よりも public にあるファイルのほうが優先されるからです。このままでは Cloud Functions にアクセスが行かず public ディレクトリに入ってる index.html が表示されてしまいます。
ここまで出来れば、ターミナルで
$ firebase serve --only hosting,functionsと実行して、ローカルで確認してみましょう。http://localhost:5000/ にアクセス出来るようになっていますので、アクセスしてみましょう。
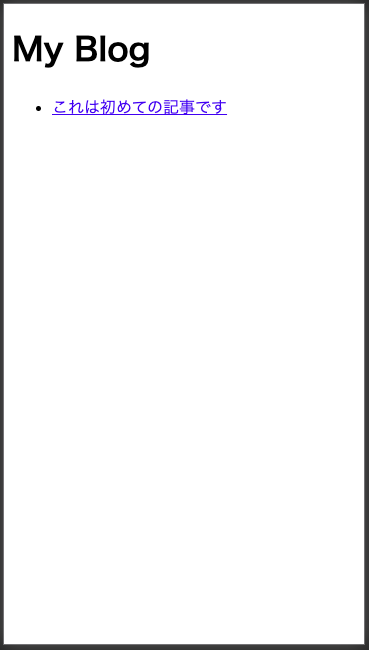
無事に、先程作ったブログが取得出来ました!でもリンクをクリックしてもまだ読めませんね。さっそく記事ページも作ってみましょう。
functions/index.js を次のように修正します。
functions/index.js
const functions = require('firebase-functions')const express = require('express')const contentful = require('contentful')const MarkdownIt = require('markdown-it')const md = new MarkdownIt()const app = express()
// contentful に ID とアクセストークンを渡してデータを取得できるようにするconst client = contentful.createClient({  space: '先程メモ帳に貼ったID',  accessToken: '先程メモ帳に貼ったアクセストークン',})
// 記事ページapp.get('/blog/:entryId', async (req, res) => {  const entryId = req.params.entryId  try {    const blogEntry = await client.getEntry(entryId)    blogEntry.fields.contents = md.render(blogEntry.fields.contents)    res.send(`<!doctype html><html>  <head>    <title>${blogEntry.fields.title}</title>    <meta name="description" content="${blogEntry.fields.title}">    <meta charset="utf-8" />    <meta name="viewport" content="width=device-width" />  </head>  <body>    <div class="wrap">      <h1 class="blogTitle">${blogEntry.fields.title}</h1>      ${blogEntry.fields.contents}    </div>  </body></html>`    )  } catch (e) {    res.status(404).send('404')  }})
// '/' にアクセスしてきたらapp.get('/', async (req, res) => {  // ブログの記事一覧を取得する  const blogList = await client.getEntries({    order: '-sys.createdAt',    content_type: 'blog',  })
  // ブログの記事への aタグ を作る  const blogLinkDom = blogList.items.reduce((acc, cur) => {    return acc + `<li class="blogList"><a href="/blog/${cur.sys.id}">${cur.fields.title}</a></li>`  }, '')
  // 作成した aタグ を埋め込んだ HTML を返す  res.send(`<!doctype html><html>  <head>    <title>My Blog</title>    <meta name="description" content="My Blogです。">    <meta charset="utf-8" />    <meta name="viewport" content="width=device-width" />  </head>  <body>    <div class="wrap">      <h1>My Blog</h1>      <ul>        ${blogLinkDom}      </ul>    </div>  </body></html>`  )})
exports.app = functions.https.onRequest(app)
これで記事ページも出来ました!ローカル環境を再度立ち上げて http://localhost:5000/ を見てみましょう!
$ firebase serve --only hosting,functions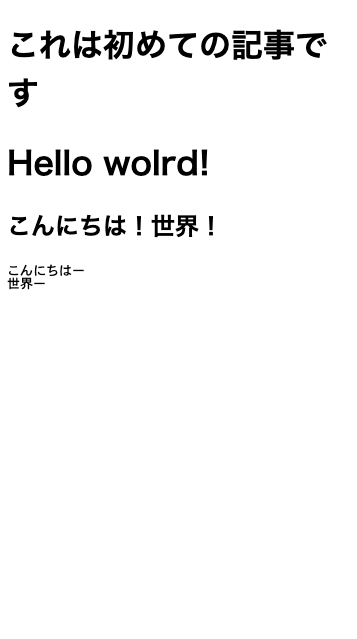
ちゃんと記事が読めました。markdown で書いた本文もきちんと HTML に変換されています。これでほぼ完成です!あとは public ディレクトリにこんな style.css を置いてみたり、
style.css
/*  -----------------    Reset  -----------------*/a,abbr,acronym,address,applet,article,aside,audio,b,big,blockquote,body,canvas,caption,center,cite,dd,del,details,dfn,div,dl,dt,em,embed,fieldset,figcaption,figure,footer,form,h1,h2,h3,h4,h5,h6,header,hgroup,html,i,iframe,img,ins,kbd,label,legend,li,mark,menu,nav,object,ol,output,p,q,ruby,s,samp,section,small,span,strike,strong,sub,summary,sup,table,tbody,td,tfoot,th,thead,time,tr,tt,u,ul,var,video {  margin: 0;  padding: 0;  border: 0;  font: inherit;  vertical-align: baseline;  font-size: 1rem;}article,aside,details,figcaption,figure,footer,header,hgroup,menu,nav,section {  display: block}blockquote,q {  quotes: none}blockquote:after,blockquote:before,q:after,q:before {  content: '';  content: none}table {  border-collapse: collapse;  border-spacing: 0}ol,ul {  list-style: none}
/*  -----------------    Common  -----------------*/* {  -webkit-tap-highlight-color:rgba(255,255,255,0);  box-sizing:border-box;  word-break: break-all;}
html {  scroll-behavior: smooth;}
body {  font-family: 'Helvetica Neue',  Arial,  'Hiragino Kaku Gothic ProN',  'Hiragino Sans',  Meiryo,  sans-serif;  text-rendering: optimizeLegibility;  -webkit-font-smoothing: antialiased;  position: relative;}
p {  line-height: 1.9rem;  font-size: 1rem;  margin-bottom: 1.5rem;}
img {  max-width:100%;}
.wrap {  margin: 0 auto;  max-width: 800px;  padding: 0 1rem;}
h1 {  font-size: 2rem;  font-weight: bold;  margin-top: 5rem;  margin-bottom: 3rem;}
.blogTitle {  font-size: 3rem;  line-height: 4rem;  font-weight: bold;  margin-top: 5rem;  margin-bottom: 3rem;}
li {  list-style: inside;  margin-bottom: 1.5rem;}
pre {  margin-top: 2rem;  margin-bottom: 2rem;  background: #333;  padding: 1rem;  line-height: 1.6rem;  overflow-x: scroll;  color: #fff;  font-size: 0.8rem;  line-height: 1.5rem;}
pre code {  font-size: 0.8rem;  line-height: 1.5rem;}
pre code span{  font-size: 0.8rem;}
:not(pre) > code {  color: #fff;  background: #333;  padding: 0.1rem;  margin: 0 .5rem;  font-size: 1.2rem;}
footer {  padding: 0 1rem;  margin-top: 5rem;  margin-bottom: 3rem;  text-align: center;}
functions/index.js も 404 ページを作るなり css を読み込むなり、体裁を整えれば…
functions/index.js
const functions = require('firebase-functions')const express = require('express')const contentful = require('contentful')const MarkdownIt = require('markdown-it')const md = new MarkdownIt()const app = express()
// contentful に ID とアクセストークンを渡してデータを取得できるようにするconst client = contentful.createClient({  space: '先程メモ帳に貼ったID',  accessToken: '先程メモ帳に貼ったアクセストークン',})
// 記事ページapp.get('/blog/:entryId', async (req, res) => {  const entryId = req.params.entryId  try {    const blogEntry = await client.getEntry(entryId)    blogEntry.fields.contents = md.render(blogEntry.fields.contents)    res.send(`<!doctype html><html>  <head>    <title>${blogEntry.fields.title}</title>    <meta name="description" content="${blogEntry.fields.title}">    <meta charset="utf-8" />    <meta name="viewport" content="width=device-width" />    <link rel="stylesheet" href="/style.css">  </head>  <body>    <div class="wrap">      <h1 class="blogTitle">${blogEntry.fields.title}</h1>      ${blogEntry.fields.contents}    </div>  </body></html>`    )  } catch (e) {    res.status(404).send('404')  }})
// '/' にアクセスしてきたらapp.get('/', async (req, res) => {  // ブログの記事一覧を取得する  const blogList = await client.getEntries({    order: '-sys.createdAt',    content_type: 'blog',  })
  // ブログの記事への aタグ を作る  const blogLinkDom = blogList.items.reduce((acc, cur) => {    return acc + `<li class="blogList"><a href="/blog/${cur.sys.id}">${cur.fields.title}</a></li>`  }, '')
  // 作成した aタグ を埋め込んだ HTML を返す  res.send(`<!doctype html><html>  <head>    <title>My Blog</title>    <meta name="description" content="My Blogです。">    <meta charset="utf-8" />    <meta name="viewport" content="width=device-width" />    <link rel="stylesheet" href="/style.css">  </head>  <body>    <div class="wrap">      <h1>My Blog</h1>      <ul>        ${blogLinkDom}      </ul>    </div>  </body></html>`  )})
app.get('*', (req, res) => {  res.status(404).send('404')})
exports.app = functions.https.onRequest(app)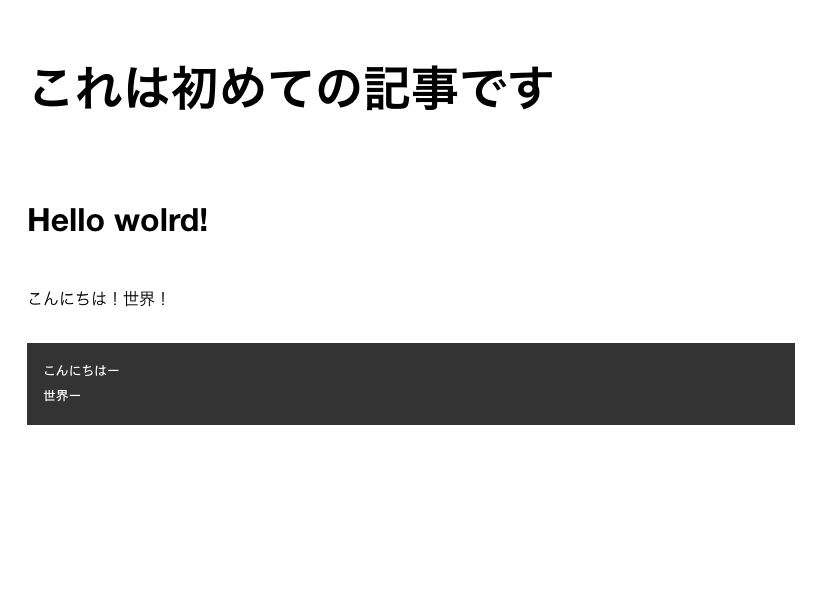
見やすくなりましたね!これで完成です!ではいよいよリリースしましょう!ターミナルで firebase deploy を実行します。
$ firebase deploy
=== Deploying to 'あなたのFirebaseのプロジェクトID'...
i  deploying functions, hostingi  functions: ensuring required API cloudfunctions.googleapis.com is enabled...i  functions: ensuring required API cloudbuild.googleapis.com is enabled...✔  functions: required API cloudfunctions.googleapis.com is enabled✔  functions: required API cloudbuild.googleapis.com is enabledi  functions: preparing functions directory for uploading...i  functions: packaged functions (26.28 KB) for uploading✔  functions: functions folder uploaded successfullyi  hosting[tlazolteotnia]: beginning deploy...i  hosting[tlazolteotnia]: found 1 files in public✔  hosting[tlazolteotnia]: file upload completei  functions: updating Node.js 12 function app(us-central1)...✔  functions[app(us-central1)]: Successful update operation. i  hosting[tlazolteotnia]: finalizing version...✔  hosting[tlazolteotnia]: version finalizedi  hosting[tlazolteotnia]: releasing new version...✔  hosting[tlazolteotnia]: release complete
✔  Deploy complete!
Project Console: https://console.firebase.google.com/project/tlazolteotnia/overviewHosting URL: https://tlazolteotnia.web.app
deploy が成功すると最後に Hosting の URL が記述されます。自分の場合は https://tlazolteotnia.web.app です。
さっそくアクセスしてみて、先程ローカルで確認したのと同じものが見えれば成功です!お疲れ様でした。
おわりに
これであなただけのブログが出来ましたね。あとは CSS でカッコよくするなり JS でリッチにするなり、自分の思うがままのブログを作り上げましょう!自分はこのようにしてみました。
では、よいブログライフを!